CUSTOM_DOCUMENTS Step
Overview
The CUSTOM_DOCUMENTS step allows users to customize document planning data (media asset and content metadata). It is used when a wizard requires users to adjust or refine document before continuing the workflow.
This step is especially useful for:
- Editing planning data for static documents
- Triggering a
Camundaprocess after saving
When to Use This Step
Use the CUSTOM_DOCUMENTS step when the wizard needs:
- Modifying planning data of some static documents
- Preparing planning data before a PROCESS step
- Refreshing the document preview after planning data changes
Typical use cases:
- Updating content metadata/media asset on planning nodes
- Triggering a process to regenerate previews
Prerequisites
- Each document displayed in the Customization step must contain at least one planning item with associated media assets.
- If text editing is enabled for a document, its content metadata entity must be properly configured in the ISON file.
Key Features
- Update planning data for the selected document, including media assets and content metadata.
- Editable content metadata fields are configurable through the ISON file. The number of fields available for editing depend on the configuration.
- Configurable media asset selection: By default, one media asset can be assigned to a planning. When a grouping entity is configured in the ISON file, one media asset can be assigned to each group. A data provider can also be configured to filter the available media assets.
- Can trigger a
Camundaprocess when the change is saved - Supports automatic refresh of the document preview after process execution
Behavior Summary
Filtering Displayed Documents
By default, all documents in a publication are displayed during the Customization step. If you want to display only specific documents based on custom conditions, you can use the following option:
<parameter key="document_filter">customization_filter</parameter>
- This parameter enables a Document Filter to control which documents are displayed.
- The value of the
document_filterparameter must be the ID of a filter defined in thedocumentFilterssection. - For detailed information about configuring a Document Filter, see: Document Filter.
Planning Data Editing
Users can:
- Select one or more document entries
- Edit planning data for those documents: select the media assets or update the content metadata
- Save changes to backend
Grouping Media Assets
<parameter id="group_media_asset">image_1;logo_2</parameter>
- The id
group_media_assetis the flag to make UI change from default view: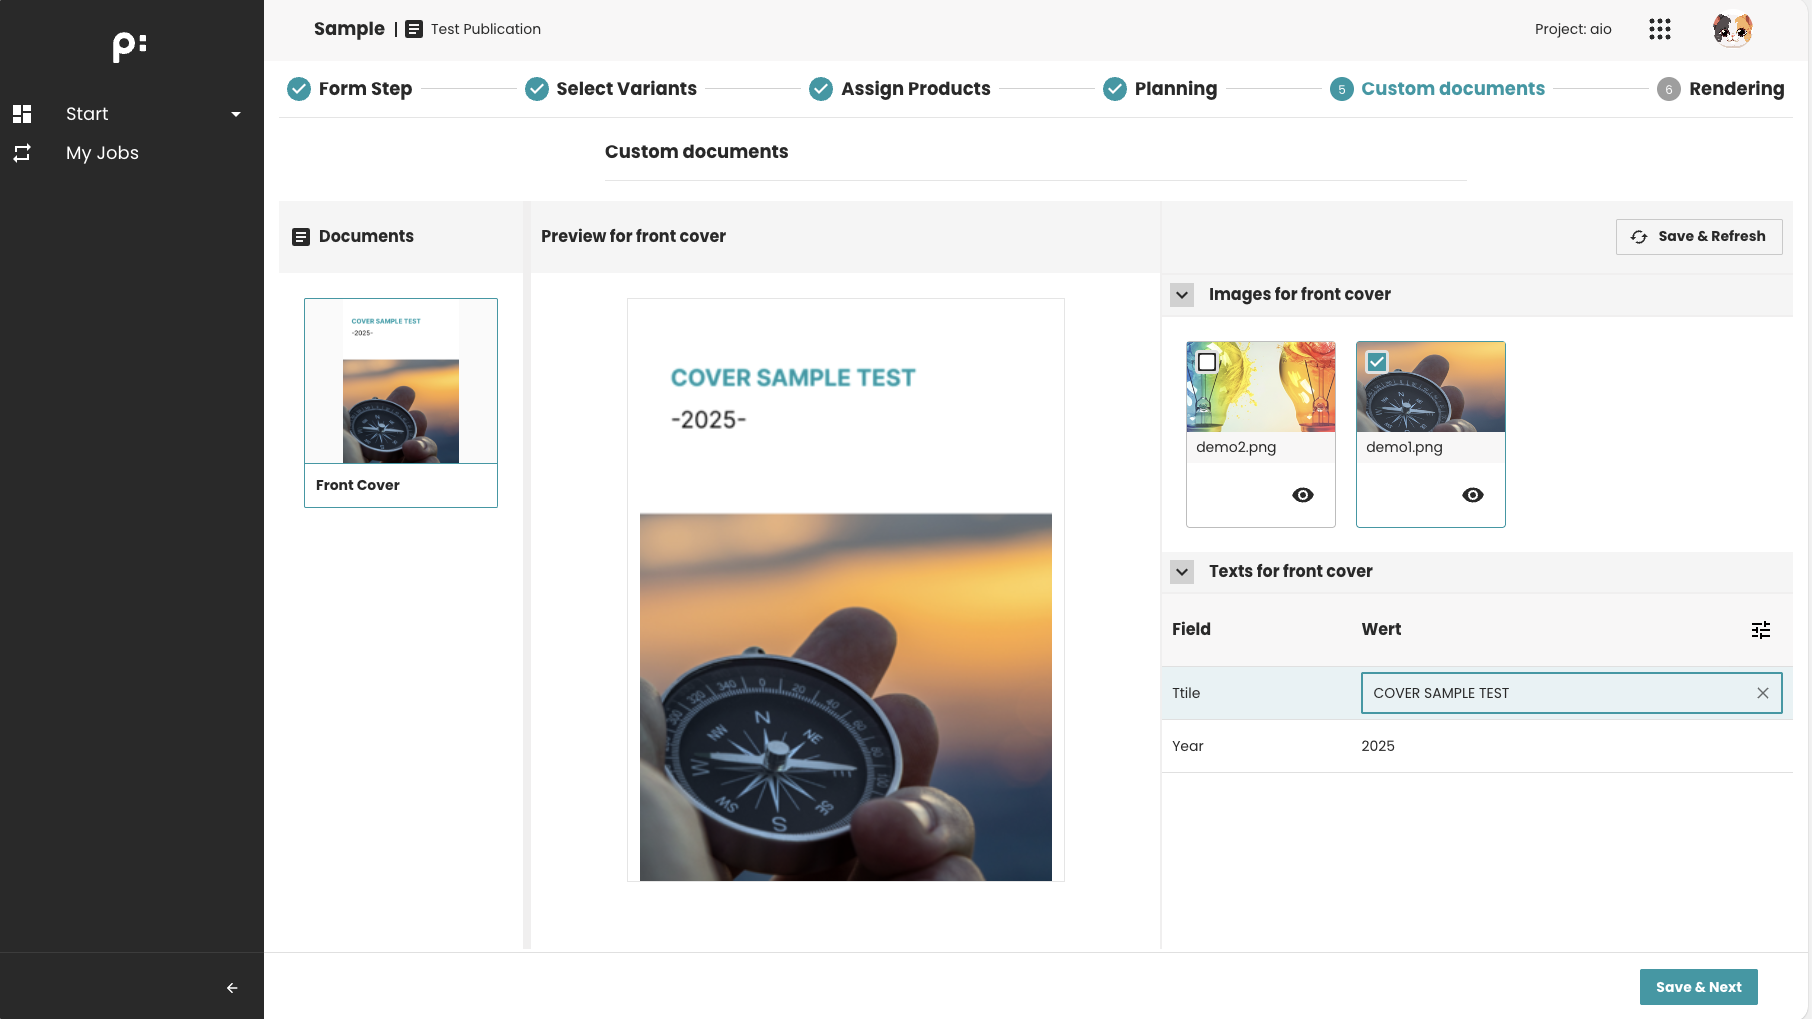
to the grouping view:
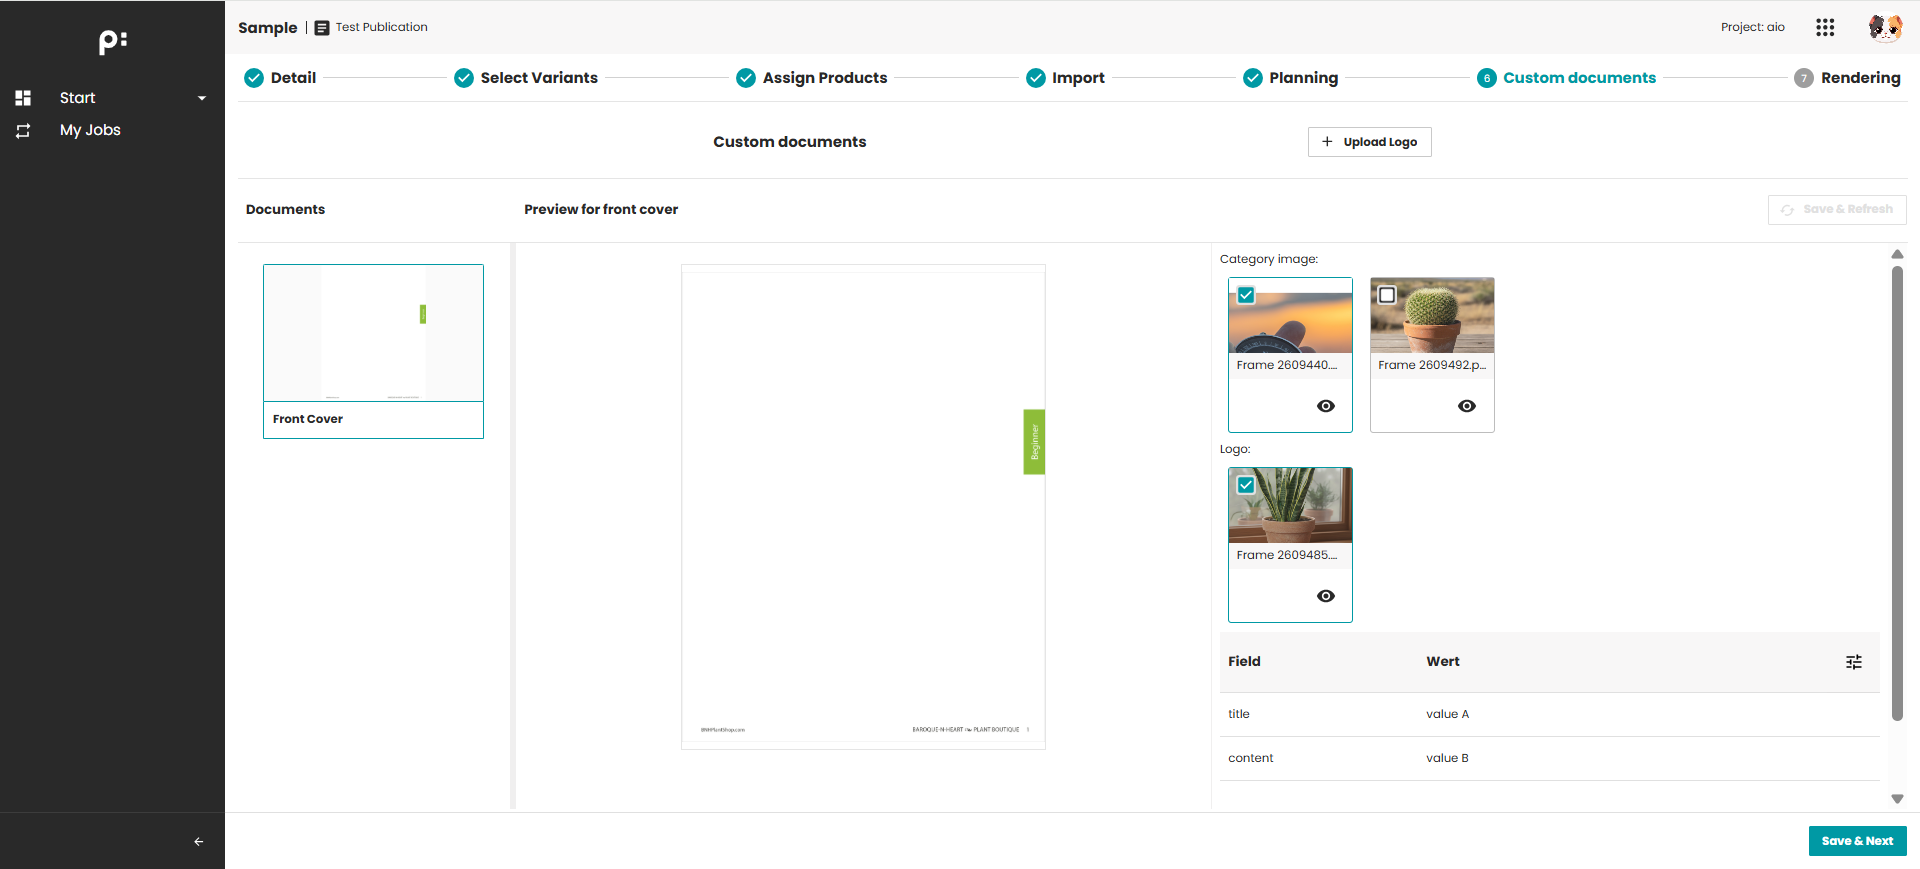
If there is no parameter with id group_media_asset, then the default UI will be applied.
- Multiple entity of media asset can be configured, they should be separated by semicolon
;.
Data Provider for Filtering Media Assets
<parameter id="data_provider">SampleDataProvider</parameter>
- To filter media assets based on custom conditions, you can configure a data provider. This parameter is optional. If no data provider is configured, all media assets in the planning bucket are returned.
- The parameter value must be the identifier of the data provider. In the example above, the identifier is
SampleDataProvider. - The data provider must return a list of
com.priint.pubserver.plugin.entitydata.MediaAssetobjects. - By default, Web2Publish passes the following parameters to the data provider as the additional parameters:
publicationIdplanningId
- Currently,
planningIdalways refers to the identifier of the first planning of the selected document.
Configuring Editable Content Metadata
As described above, you can configure which planning content metadata fields are editable during the Customization step.
For example:
<parameter id="content_metadata">entity_1;entity_2</parameter>
- The
content_metadataparameter defines which content metadata entities can be edited. - To configure multiple entities, separate their identifiers with a semicolon (
;).
Save & Refresh Logic
If a process is configured using the following parameter:
<parameter id="process_def_key">REFRESH_PROCESS</parameter>
Then the following workflow is executed when the user saves the metadata:
- The configured Camunda process is triggered.
- The UI waits until the process has completed.
- Once the process finishes, the document preview is refreshed automatically.
Notes
- The parameter value (
REFRESH_PROCESSin the example) must be the process definition key of the Camunda process to trigger. - For more information about configuring the background process, see: Process.
- This parameter is optional. If it is not configured, the feature is disabled and the Save & Refresh button is not displayed in the UI.
Completion Behavior
If required=true:
- Users must save valid planning data before continuing
- If a process runs afterward, completion depends on process success
If required=false:
- Users may skip this step without making changes
Sample Configuration
The full-features supported configuration for this step could look like:
<wizardSteps>
  <wizardStep id="custom_documents_step">
    <label>Custom Documents</label>
    <type>CUSTOM_DOCUMENTS</type>
    <status>custom_documents_status</status>
    <parameters>
      <parameter key="document_filter">customization_filter</parameter>     <!-- Filtering the displayed documents -->
      <parameter id="group_media_asset">image_1;logo_2</parameter>          <!-- Grouping Media Assets -->
      <parameter id="data_provider">sampleDataProvider</parameter>          <!-- Data provider to filter media assets -->
      <parameter id="content_metadata">entity_1;entity_2</parameter>        <!-- Configure the editable content metadata -->
      <parameter id="process_def_key">REFRESH_PROCESS</parameter>           <!-- Enable Save & Refresh  -->
    </parameters>
  </wizardStep>
</wizardSteps>
...
<documentFilters>
    ...
    <documentFilter id="customization_filter">                              <!-- Detail configuration for the filtering the displayed documents -->
        ...
    </documentFilter>
    ...
</documentFilters>
...
<processes>
  ...
  <process key="REFRESH_PROCESS">                                           <!-- Detail configuration for the refresh process -->
    ...
  </process>
  ...
</processes>